

As Prism Central has continued to mature, and increase in complexity (microservices, external storage groups, etc) there has been an increased focus on folks hosting it within a Prism Element cluster. Makes sense right? That’s how we often did it with vCenter, we’d plonk it onto the vSphere/ESXi cluster it was managing.
But there may come a time where folks want to split out Prism Central away from the underlying Prism Element cluster from which it was born.
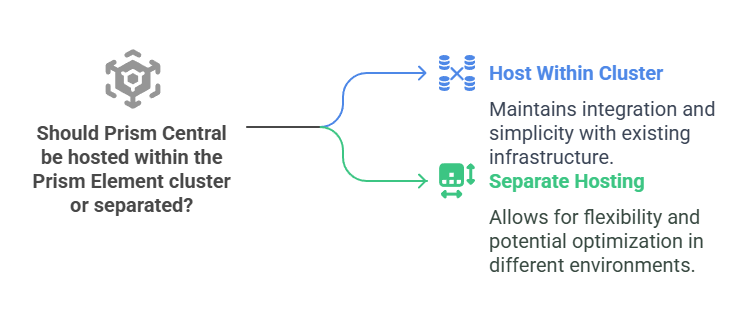
Faced with this this week for a few different reasons, we decided to move some connected clusters away to a newly deployed Prism Central instance hosted in a legacy 3-tier vSphere environment.
First things to cover off:
- It is not supported to have a scale-out / 3-node Prism Central instance on a ‘non Nutanix’ ESXi environment – so single point of failure with a single PC – Caution!
- It is discouraged due to Prism Element blacklisting to move Prism Element clusters between Prism Centrals, though it is possible – it is recommended that other options are pursued first
In our case not a problem because PC is not used in the critical path, it is just used for RBAC and a single pane of glass – no actual NCM/AIOps magic.
Our main problem was due to having mixed LTS 6.5 (moving to LTS 6.10 then Unified AOS 7.0), and new 7.0 clusters which could not be licensed, or co-exist in the PC 2024.2 that was in place, nor could this PC be upgraded due to the dropping of LTS 6.5 support. Secondarily, Prism Central was hosted within the ‘first’ deployed cluster in each datacentre that was being used for payloads also, not ideal – we’d outgrown this so wanted to move it away anyway – but not quite big enough for a dedicated management cluster (yet!)
The process cuts down into a few phases:
- Download and deploy the OVA from the Nutanix support portal into your non Nutanix vSphere environment
- Use the Nutanix vSphere CSI driver tool to tell Prism Central to not try to enable Microservices when the cluster is formed
- Form the cluster (of one Prism Central VM)
- Connect Prism Central to vCenter (with some associated config) so it can make and attach disks
- Enable Microservices within Prism Central
Part 1 – Download and deploy the OVA from the Nutanix support portal into your non Nutanix vSphere environment
We can follow the documentation though it is a little all over the place to follow with the odd side quest.
First up, we grab the download from the support portal under Prism Central being sure to pick the correct one

We use the vSphere UI to import+deploy the OVA, crucially saying to NOT power it on because we need to upgrade its VM compatibility to ‘ESXi 7.0 U2 or later‘
We also need to check that memory hotplug is enabled on the imported VM before we turn it on.
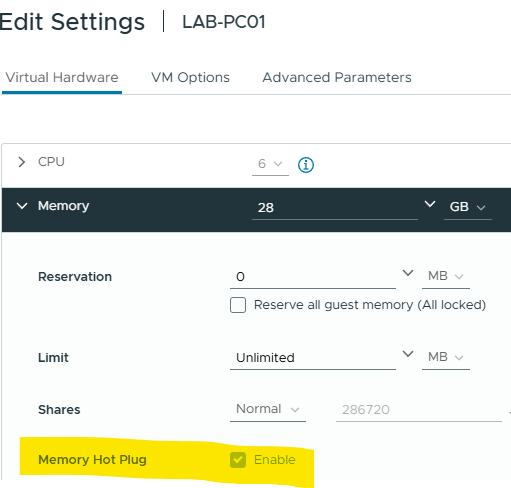
We can then power on the Prism Central VM and go make a coffee, don’t be tempted to interfere with it when it boots up, even if it looks angry – it gets over it.
After a ‘while’ you should be presented on the VM console with a logon screen (if you have DHCP running, it’ll also have an IP and a hostname) which you can log into using the normal nutanix / nutanix/4u.
At this point the documentation calls out in big letters to check that Prism Central has finished doing its first boot up thing:

If all is well, it is recommended to then set a static IP on Prism Central by editing the ifcfg-eth0 file sudo vi /etc/sysconfig/network-scripts-ifcfg-eth0 as shown in the documentation link above.
There’s also a recommendation to clear out any old entries in /etc/hosts which didn’t work for me at the time but it didn’t seem to make any difference but worth calling it out.
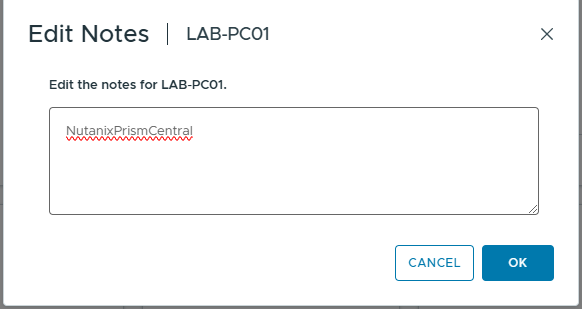
We then need to nip across to vCenter to add a note on the Prism Central VM ‘NutanixPrismCentral‘ similar to the below:
Finish all of this with a ‘sudo reboot‘ to reboot the Prism Central VM and bring it back up.
Part 2 – Use the Nutanix vSphere CSI driver tool to tell Prism Central to not try to enable Microservices when the cluster is formed
Before we can tell Prism Central to form a cluster of only itself, we have to put in place a configuration that stops Microservices being enabled at cluster creation which is a default when hosted within the Nutanix infrastructure. (this is covered on a different documentation page)
To do this, we download the vSphere CSI Bundle from the Microservices Download Page on the Support Portal

Using WinSCP/similar we upload this downloaded bundle to /home/nutanix/data on the Prism Central VM and run the following commands:
nutanix@pcvm$ cd /home/nutanix/data
nutanix@pcvm:/data$ tar -Jxvf vsphere_csi_bundle.tar.xz
nutanix@pcvm$ /home/nutanix/data/vsphere_csi_bundle/tools/setup_three_tier -e
This should complete with a message that the Prism Central Environment file has been created.
Part 3 – Form the cluster (of one Prism Central VM)
With the Prism Central VM deployed, and the Prism Central Environment file created to disable the enablement of Microservices at cluster creation we can go ahead and create the actual Prism Central cluster of just a single VM.
nutanix@pcvm$ cluster –cluster_function_list “multicluster” -s 172.16.50.50 –dns_servers “1.1.1.1,8.8.8.8” –ntp_servers “pool.ntp.org” create
This will run through and create the Prism Central cluster crucially, not enabling Microservices and will complete at which point the browser will work to https://prismcentralip:9440
Part 4 – Connect Prism Central to vCenter (with some associated config) so it can make and attach disks
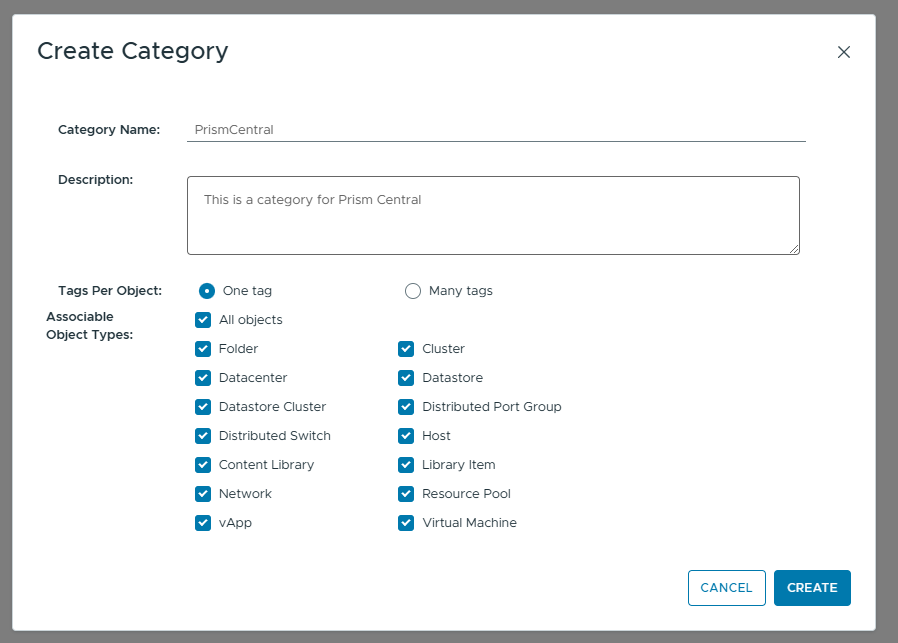
With our Prism Central (without Microservices) cluster created, we need to make some configurations again within vCenter, specifically:
- Creation of a Category
Under vSphere Client -> Tags & Custom Attributes -> Categories
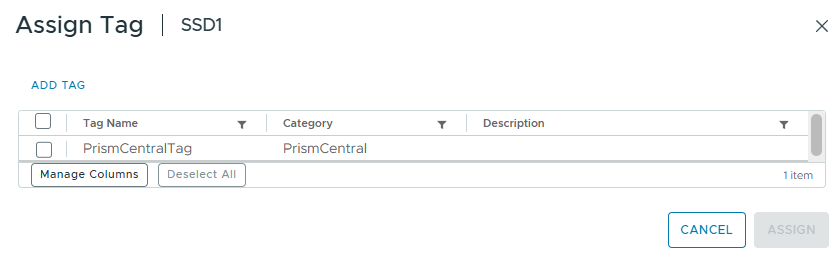
- Creation of a Tag
Under vSphere Client -> Tags & Custom Attributes -> Tags

- Association of the Tag to the Datastore that hosts Prism Central
Under vSphere Client -> Datastores View, right click on the Datastore and select “Tags & Custom Attributes”

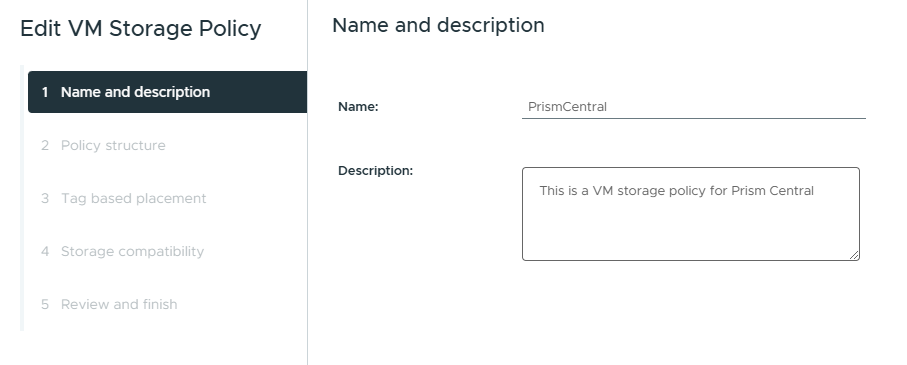
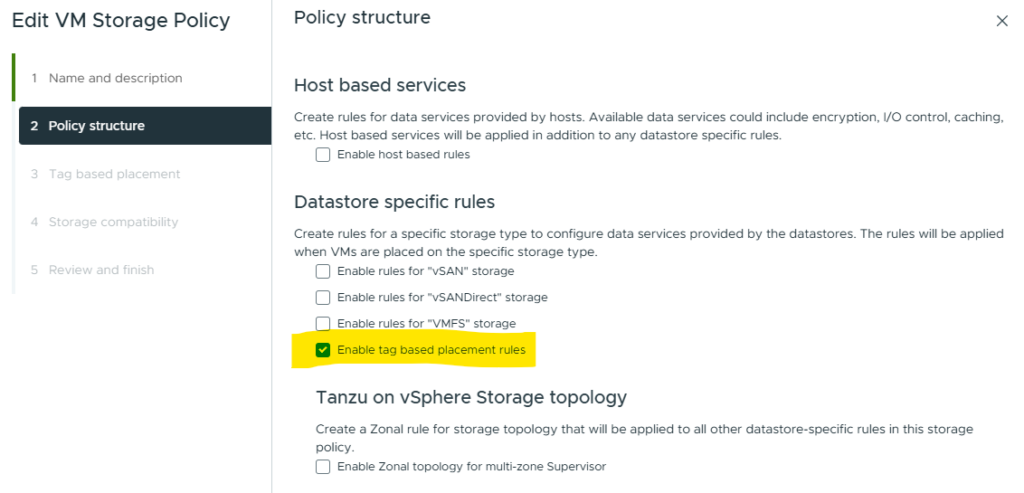
- Creation of a Storage Profile that ties all of the above together within vCenter
Under vSphere Client -> Policies & Profiles -> VM Storage Policies


From the Prism Central console (or via SSH, the docs suggest both) we execute the same ‘setup_three_tier‘ script as before but this time without the -e argument.
nutanix@pcvm$ /home/nutanix/data/vsphere_csi_bundle/tools/setup_three_tier
This will ask for the IP/hostname of the vCenter in which Prism Central is deployed, the Datacenter name (taken from vSphere), the Storage Policy we created above and account details for Prism Central to use to talk to vCenter for the creation/assignment of volumes. (service account details can be created using the Broadcom link here – Thanks Thomas a fellow NTC for the link!)
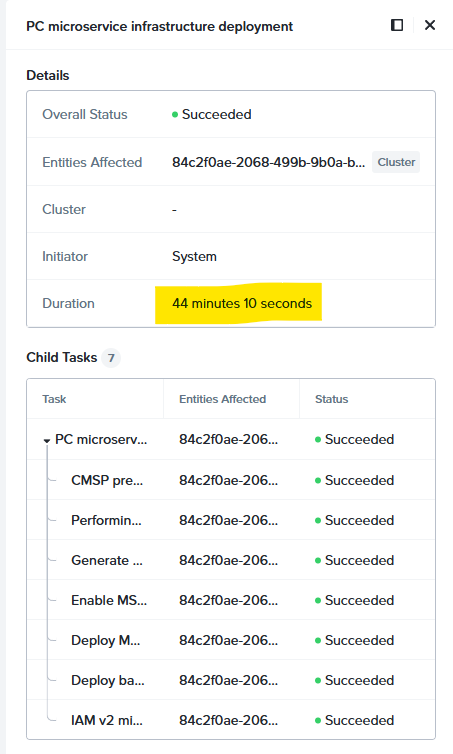
Part 5 – Enable Microservices within Prism Central
Finally, we are ready to enable Microservices, but first we must check that DNS and NTP are configured properly within Prism Central to avoid any unfortunate failures.
Once that is checked we can execute the below command to kick things off.
nutanix@pcvm$ python /home/nutanix/data/vsphere_csi_bundle/tools/enable_cmsp_3_tier.py
This can take a while to run through, make a coffee.
The documentation contradicts itself a little bit here where it suggests internet access is needed:
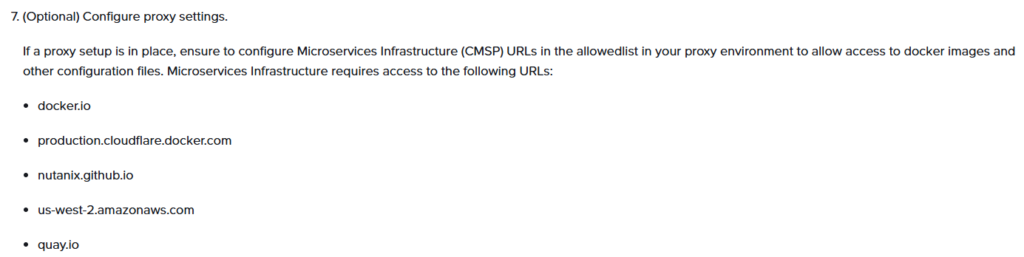
But similar it also says all is already within Prism Central 🙂

In my case I’d already downloaded the LCM Bundle for the MSP components onto my Darksite VM as I do not have internet access directly from my Prism Central and it seemed to complete fine.
PS. https://www.napkin.ai created the little image at the top of this post – it is incredibly powerful at visualising text (waffle I write) – Thanks Napkin AI 🙂