A VMware VCF (OG VCF, pre Broadcom) customer is beginning their Nutanix journey with some retired Fujitsu RX2540 M4 VSAN nodes running Community Edition for their admins to get some hands one experience.
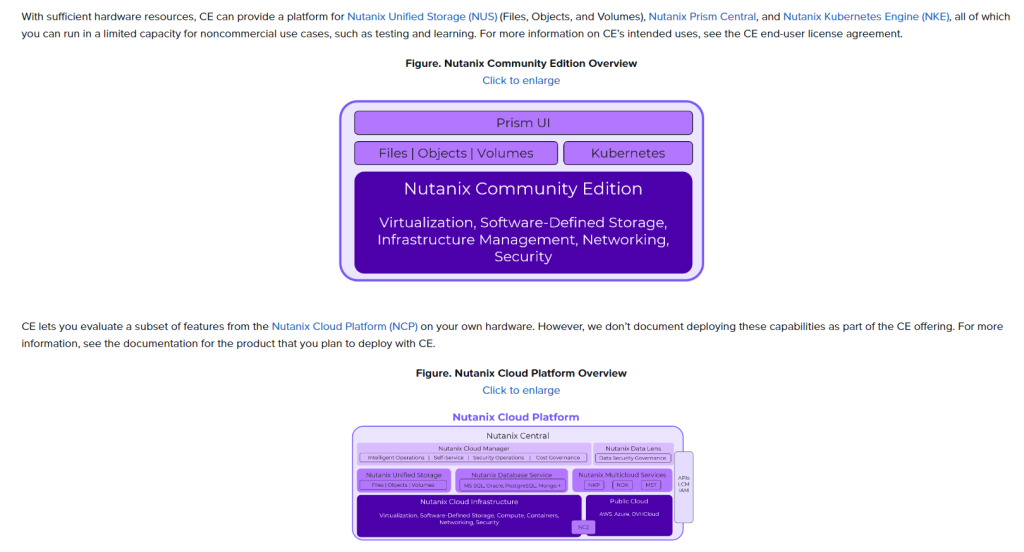
I decided to chronicle this experience – first stop https://portal.nutanix.com/page/documents/details?targetId=Nutanix-Community-Edition-Getting-Started-v2_1:top-welcome-ce-c.html to confirm the licensing / EULA that lets us run in test/learn configuration.

Downloading the CE installer (Phoenix+AOS+AHV for those of us who have installed Nutanix from ISO) and mounting it into the lights out management console on a server is a breeze, I’m in the UK, the hardware is in Sweden.
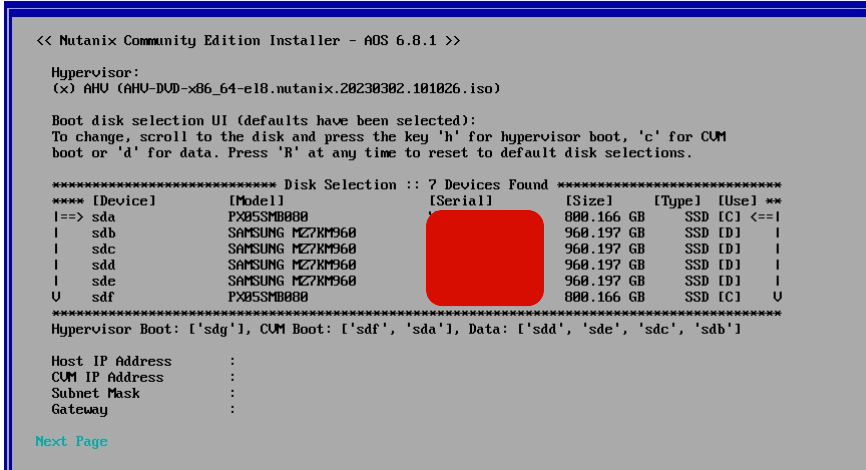
The ISO takes a while to boot, and will display the following screen once ready:

These nodes I’m using had 1x boot disk (not shown here, it’s at the bottom off-screen), a pair of VSAN cache disks (marked with ‘C’ for CVM) and 4 VSAN Capacity Disks (marked as D). We have three of these nodes to play with so set the installers off in parallel, confirming once they were done we could ping their Host and CVM IPs set in the installation UI.
Once all 3 were installed and rebooted, I confirmed I could ping them all (on both their Host and CVM IPs), and picked one (doesn’t matter which one) to SSH into on the CVM IP using username nutanixand password nutanix/4u
Once SSH’d in I was able to run the cluster creation command:
cluster -s 10.1.1.10,10.1.1.11,10.10.1.12 create(very important, no spaces between the comma separated IPs)
After a few minutes the prompt returns and we can issue the command ‘cs | grep -v UP‘ to confirm each CVM IP is listed with ‘Up’ and not services are showing down.
Setting Cluster Name – ncli cluster edit-params new-name=MyCluster
Adding NTP Server – ncli cluster add-to-ntp-servers servers=pool.ntp.org
Adding DNS Servers – ncli cluster add-to-name-servers servers=8.8.8.8
Browsing to https://ip:9440 of any CVM will lead to this pretty login screen (no plugins needed)

(if you have problems reaching port 9440 as a non-standard port, it is possible to SSH tunnel through the CVM redirecting a local port e.g. 9440 to the remote port 127.0.0.1:9440 so you can then reach the CVM via https://localhost:9440 with the connection tunnelled over SSH.
Log in here with the default adminand password nutanix/4uand you’ll be forced to change password.
On first logon it is necessary to log in using your Nutanix NEXT (My Nutanix) account credentials, this requires the cluster to have an active internet connection outbound per the licensing guidelines:


If you do not have outbound connectivity from the cluster, it is possible to configure a HTTP Proxy with ncli http-proxy add name=proxy_name address=ip_addr username=user password=password port=8080 proxy-types=http,https
Next post will be updating CE using LCM

